
Most of our development time is focused on the application of risk-based vulnerability management: DeepSurface does the math (there’s a lot of math) and shows you which vulnerabilities carry the greatest risk in your environment, and why. People frequently respond to a demo of DeepSurface with, “That’s amazing… but what do I do next?”
Next has so many variables and is wildly different for each and every organization. Fortunately the designers and engineers at DeepSurface have made careers out of solving very difficult problems.
The simplest solution – export some lists to a spreadsheet – places the burden of next on the vulnerability management team: slice and dice the spreadsheets; use other spreadsheets to figure out the cabals, departments and/or admins who might apply those patches; fire off some tickets. Later, if a vulnerability gets remediated, the vulnerability manager does more spreadsheet magic and tool juggling, checking if the vulnerability was truly remediated. Don’t forget about scheduling issues! If the vulnerability team checks for issues weekly and IT is only patching monthly, there’s a good chance everyone’s getting 4x the workload than necessary in any given month.
Our answer to all of these problems and more is our Remediation Workflow feature, shipping in DeepSurface 3.0.
Remediation Workflow is seamlessly integrated into all of our reporting and exploration tools. Identify some areas of risk and add them to a remediation plan in seconds. DeepSurface does the rest.
Step 1: Build a Plan, 2 ways
The easiest way to create a remediation plan is to simply select some items while browsing the reports. Simply tick the checkboxes next to hosts/patches/vulnerabilities and select “Add to Remediation.”

Alternatively you can use our Workflow Wizard to quickly add or remove items:
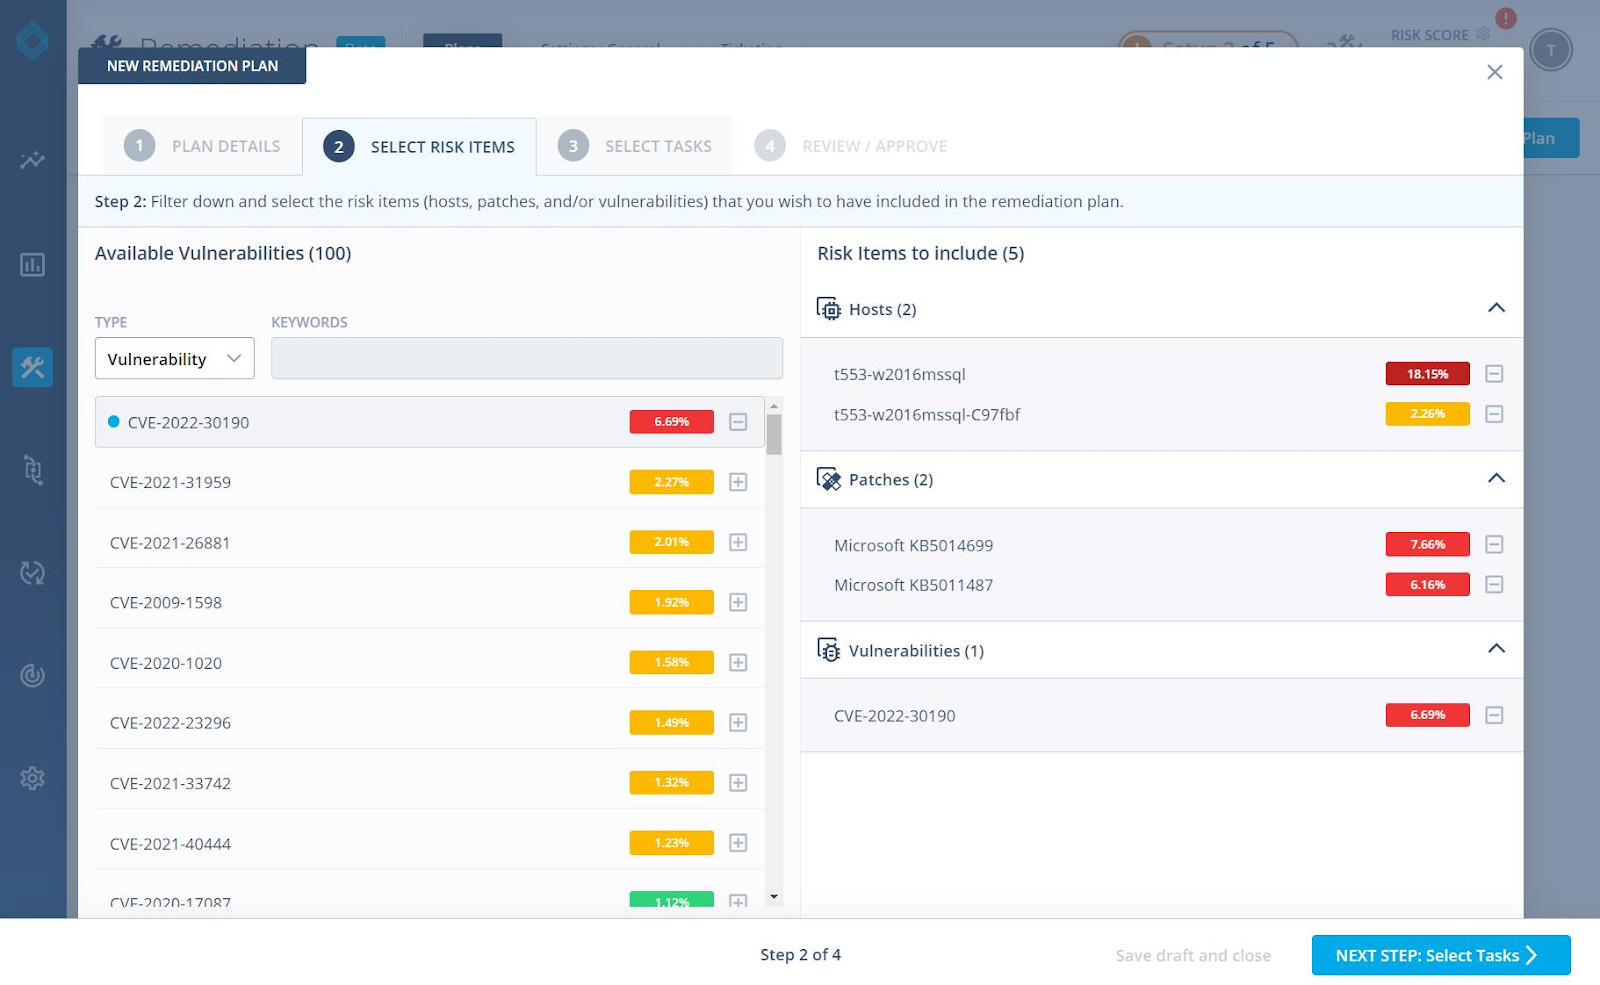
You can switch back and forth between selecting items from reports or lists at any time as you develop your plan. Once satisfied, the next step is to take a look at the actual work your team will perform.
Step 2: From Risk Items to Tasks
Now you have some set of risk items, but each risk item can contain a number of tasks:
- Saying “fix this host” might mean applying 127 patches, but there are only 2 patches that account for any measurable amount of risk
- “Apply this patch” could represent thousands of hosts across multiple departments with different teams responsible for patching. Really, you’d like to apply the patch to a handful of externally-facing hosts
- “Mitigate this vulnerability” could mean multiple patches across a handful of different Operating Systems
This next stage of the Remediation Workflow takes all the above (and more) into account and presents you with a simple interface allowing you to add and remove remediation tasks.

You won’t repeat yourself or duplicate work because we won’t let you! All of the tasks are sorted, deduplicated and automatically assigned to their respective owners based on tagging information.
Step 3: Export and Monitor Progress
After a quick review, you’re ready to export your tasks to workflow management tools like Jira, or to email. Each ticket is assigned to the person/team who manages these resources and has everything you need to know about the issue, including risk data straight from the DeepSurface Risk Analyzer reports.

As your teams address the vulnerabilities in your plan, you can see the change in risk and the instances remediated within the remediation dashboard. You can easily correlate changes in your risk-over-time graphs with the fixes you’ve applied as part of your remediation workflow.

I’m proud of the team for all the work they put into this and we’re thrilled we can finally share it with you. We spent months sweating over the details and rolling out incremental features to support this project hidden behind developer-only flags. We’ll be doing some deep-dives into the various aspects of remediation in the coming weeks, so stay tuned. In the meantime, why not try a demo?